Saturday, 23 February 2013

Fuel Filler Cap


I decided to treat myself to the Aston filler cap from Chris at Brasscraft along with the filler hose and clips etc from CBS. The filler flange that the Aston cap attaches to i had already got from Brasscraft last year. Allot of people do say that Chris's products are expensive (and i agree they are) but they certainly have a top class quality to them, and you would be hard pushed to find a better quality item, so worth the money in my opinion.

I intended to initially bond the filler flange to the body as so that no fixings were visible and kept with my "clean lines" theory that i was wanting to achieve. This plan sharp went out the window when the filler hose arrived. I ordered the heavy duty filler hose rather than the super flex stuff as i was trying to avoid fuel vapour smell in the boot once completed. However the heavy duty hose is so rigid that the amount of pressure it would put on the filler flange meant that it would never have bonded in a million years, so drill the flange and countersink the heads.


First job was to cut the access hole in the inner wing so the hose can pass from the cap to the tank. Not an enjoyable task to be honest, as the hose is very rigid so not easy to flex through the gap, and when cutting the hole i wanted it to fit nicely, rather than to big. Once the hole was cut it needs to be edged with some off cut of rubber bonnet seal. After paint and IVA i will seal round the gap with some silicon to stop the weather invading the boot area. I have also cut the hole big enough for the filler breather pipe which is just a length of 10mm fuel hose.


With the hose roughly cut to length its just a case of trial and error, until the correct length is achieved. You need to take care that you cover the filler of the tank as so to stop any crap or crud falling in as your working. I found it best to secure the top flange with the locking insert as so that end was sealed and then offer it down through the wing onto the tank. 


With the length pretty much done, now was time to drill and fit the top flange. Chris machines in the fixing positions equally around edge so its just a simple case of drilling through and then counter sinking the heads of the screws. When you get the filler cap you will also get some paper washer/gaskets that fit into the cap and will adjust the lock down position. So if you need to rotate the cap a bit you can just insert x amount of washers and it will reduce the amount of rotation before locking out. After checking with AK regarding this i was advised not to use any of the washers/gaskets so that the cap screws all the way down onto the flange. This is to do with the final height and orientation of the filler for IVA requirements. 


When it comes to the screw/bolt heads i ordered stainless steel socket heads so that they fit the recess nicely and fixing using an allen key. The only way i was able to cut the countersunk recess was with a larger drill bit then  to slowly open up with the dremmel. I do have a bit to do it but with the threads for the filler cap it would have made a terrible mess of the polished finish. Overall it looks ok, not perfect, but not noticeable unless you really look, and half the heads are covered when the cap is screwed down. So move on to fitting the flange to the body.


Before any cutting and drilling the cap needs to be screwed down and roughly put into position. You need to make sure that when the cap is open that it doesn't flip back and touch the bodywork, same with the release clip. This is something i hadn't even considered until i checked with Wendi at AK. Imagine getting the car all painted and then when you open the cap you chip the paint i would have been gutted!!


The cap needs to be rotated clockwise as much as possible before it touches the body on the hinge and release clip. Again this is to comply with the IVA regulations on radius i believe. I was speaking to a mate Paul the other day regarding this and i fear i will have to rotate mine more (i had already drilled and fixed) as he was saying that the cap hinge needs to be pointing towards the passenger side windscreen post in order to achieve the required angle for IVA compliance. Mine is more towards where the passenger side roll bar leg would be (if i had one) So something i will have to possible adjust prior to IVA. I'll keep you posted.

Fitting the flange is just a simple task of drilling through the body to fit. This is why it is important to finalise the position of the filler cap first with regards to it touching the body, as the fixing holes will obviously be in a required position. Also i was sure to cover the filler hose prior to drilling through the body as you don't want fibreglass dust down in the tank!! Also another tip i thought of when fitting, don't let your neighbour stand watching you next to an open fuel tank with his lit cigarette in hand!!! haha fuel vapour is allot more volatile than the liquid itself!! Just ask "Tony M" of the Cobraclub forum.... he has a great knowledge of fuel tank vapour and explosions!!!

So all fitted and complete you will see that the cap also has a locking insert which i have been told is not actually required for IVA as the Aston cap itself has a seal. I personal will just leave it in i think, its no hardship to undo when filling up, and will mean i have to remove the key from the ignition in order to fill up. I have also got a unleaded fuel restrictor in the cap, as so that if the diesel pump is picked up by mistake it will not fit the filler. I have never in my life miss fuel but i sure as hell don't want my Cobra to be the first time and my daily drive is diesel so "belts and braces" technique again. 


I'm happy with this overall and all that is left to do is to fit a one way valve to the breather hose to allow the tank to breath in the hot summer. This will just be running up the filler hose and secured above the fill level under the flange. I will also be running an earth cable from the filler cap down to the chassis, as so to reduce the risk of static spark when filling up, this will simply be a ring terminal off one of the fixing bolts down to chassis... job done!!!                                                                                                                             Next on the list.... save shed loads of money for wheels and tyres!!!! so expect an update in 2015!!

Monday, 14 January 2013

Clean the Screen


So another update on progress..... yes two updates within a month wowsers!!

After Christmas i also ordered the wiper package from AK this consists of the wiper arms and blades, wheel box's/spindles and the wiper motor complete with bundy tube. On the AK in order to achieve full clearance of the screen 3 wipers are needed. This is one of the first bits to look at to identify an AK kit. This was one of the bits that i was considering changing and only fitting two wipers simply because i prefer two to three. But after chatting to a few people i have decided to follow AK's advice and stick with three, this will give sufficient clearance of the screen required for IVA and not leave the centre part of the screen unwiped. So first things first when cutting into the body is measure twice and cut once. I simply laid the tapered chrome bezels on the top scuttle just in front of the rubber windscreen seal, to give me a rough layout of the position of the wheel box spindles. They come with rubber washers to protect the paintwork between the metal and the body so these are good for using as a cutting template.


Once i was happy with the spacing and i had checked the underside for clearance etc.. i checked all measurement's again. I even held a wiper arm and blade in position with each spindle position and checked roughly screen clearance and wipe area.

So with the areas to be cut marked out. cutting could be started, simply with a good size drill bit and position the drill so that it cuts through at roughly the same angel as the spindle will be (rather than just straight down through the scuttle) Once one was done its just a simple case of opening the hole slowly using a file so that the spindle of the wheel box fits through nicely, these are then just held in place with the top bezel and nut. now  repeat the process twice more and fit the wheel box's.


When the spindles are secured i was able to offer up a wiper arm and blade, and with no gear linkage in place its free to move so i could do a good check for the sweep. I didn't want the blades to catch the top of the screen or have any contact with each other during operation or parked position.

Same again with two wipers fitted, checking clearance and movement of the arms and same again with all three on. This is actually a very enjoyable job to do in my opinion, its very simple and with basic understanding of how this all operates its great to see the wipers move and do what they are supposed to do.


So now with all three wheel box's and wipers fitted its onto the motor itself. This is located on a pre mounted bracket on the AK chassis under the scuttle just to the right of the steering column. It is held in place with the supplied clamp and rubber mounting blocks to keep the motor nice and quiet when running. If you have any experience with classic mini's the wiper setup is exactly the same, but the motor is fitted in the engine bay rather than cockpit.


The wiper motor has a long geared cable (i forget its actual name) looks like a long flexible Archimedes screw that runs from out the motor. This is simply fed through the wheel boxes in turn and provides the movement for each wiper arm. I initially put all this together and did a quick test run. This was exciting pressed the stalk down and the wipers burst into life sweeping the screen very nicely indeed... happy days.


Now was just a quick case of fitting the bundy tube. This is just a alloy tube that has to be cut to size to fit between each wheel box so the geared cable runs through it. This is cut with a pipe cutter and when you have required length you will need to put a small flare on each end. This is so that each wheel box clamps over it when fully installed it actually firms up any movement you had in the spindle when just held with the top nut. A little bit of patience here as its cut then flare and test fit... if still to long, cut again another flare and test fit.


When you have all sections cut to size and they fit well its time to get down and dirty.... The bundy tube and all the gears will work best and more importantly quietest when they are well greased up. So i set about ramming each section of tube with as much bearing grease i could get in. Also smear the geared cable with as much as you can, nice messy job this so keep some cloths to hand.


Now were starting final assembly (well final for the time being, as a full removal will be required for paint shop) with all the box's linked and clamped, and the bundy tube all secure you can cut off the excess of the geared cable. I left a good 3"- 4" overhang to account for the movement when in operation and cut back. So with all this complete only one job left to do...... test they all work.


Working well as you can see in the video. Some bending of the arms is required to give a good even clean of the screen along with some grease in the arm springs, as you can hear in the video they are a little creaky.

I also sprayed the screen with a misting bottle to see how they preform, and i was pleasantly surprised. I was dreading they would be like one of my old mini's where a took a perfect working set of black plastic blades off and fitted chrome wipers.... only to find the looked nicer, but instead of wiping the screen they just smeared the water and made visibility worse, but they looked nicer than the black plastic ones..... so they stayed on!!!

I still need to drill a couple of holes for the washer jets bit this is just a quick 2 second job, so no hurry for that. 

Another update soon. I'm hoping to get a few loose ends finished off such as the fuel filler hose and filler cap, along with little jobs like the heater air flow to the matrix and the internal foot well vents. Keep checking back for that in the next month i hope.

Friday, 11 January 2013

Christmas gave me gas!!!!

Well did threaten an update soon, and now Christmas is in the past i have managed to find some garage time and get some bits done.

I placed an order with AK for the gas rams for the boot and bonnet, along with the windscreen wiper package (see next update)

Upon arrival i started with a quick dry run off all the parts that had arrived. After checking a couple of things with AK Jon advised me to do the bonnet first and boot second. This is because the gas rams that are sent are rock solid with gas and you have to bleed the gas out using a valve provided to give the correct resistance for the item being held. With the bonnet being heavier than the boot it makes sense to to this first in case too much gas is let out by mistake, it can then be used for the boot.

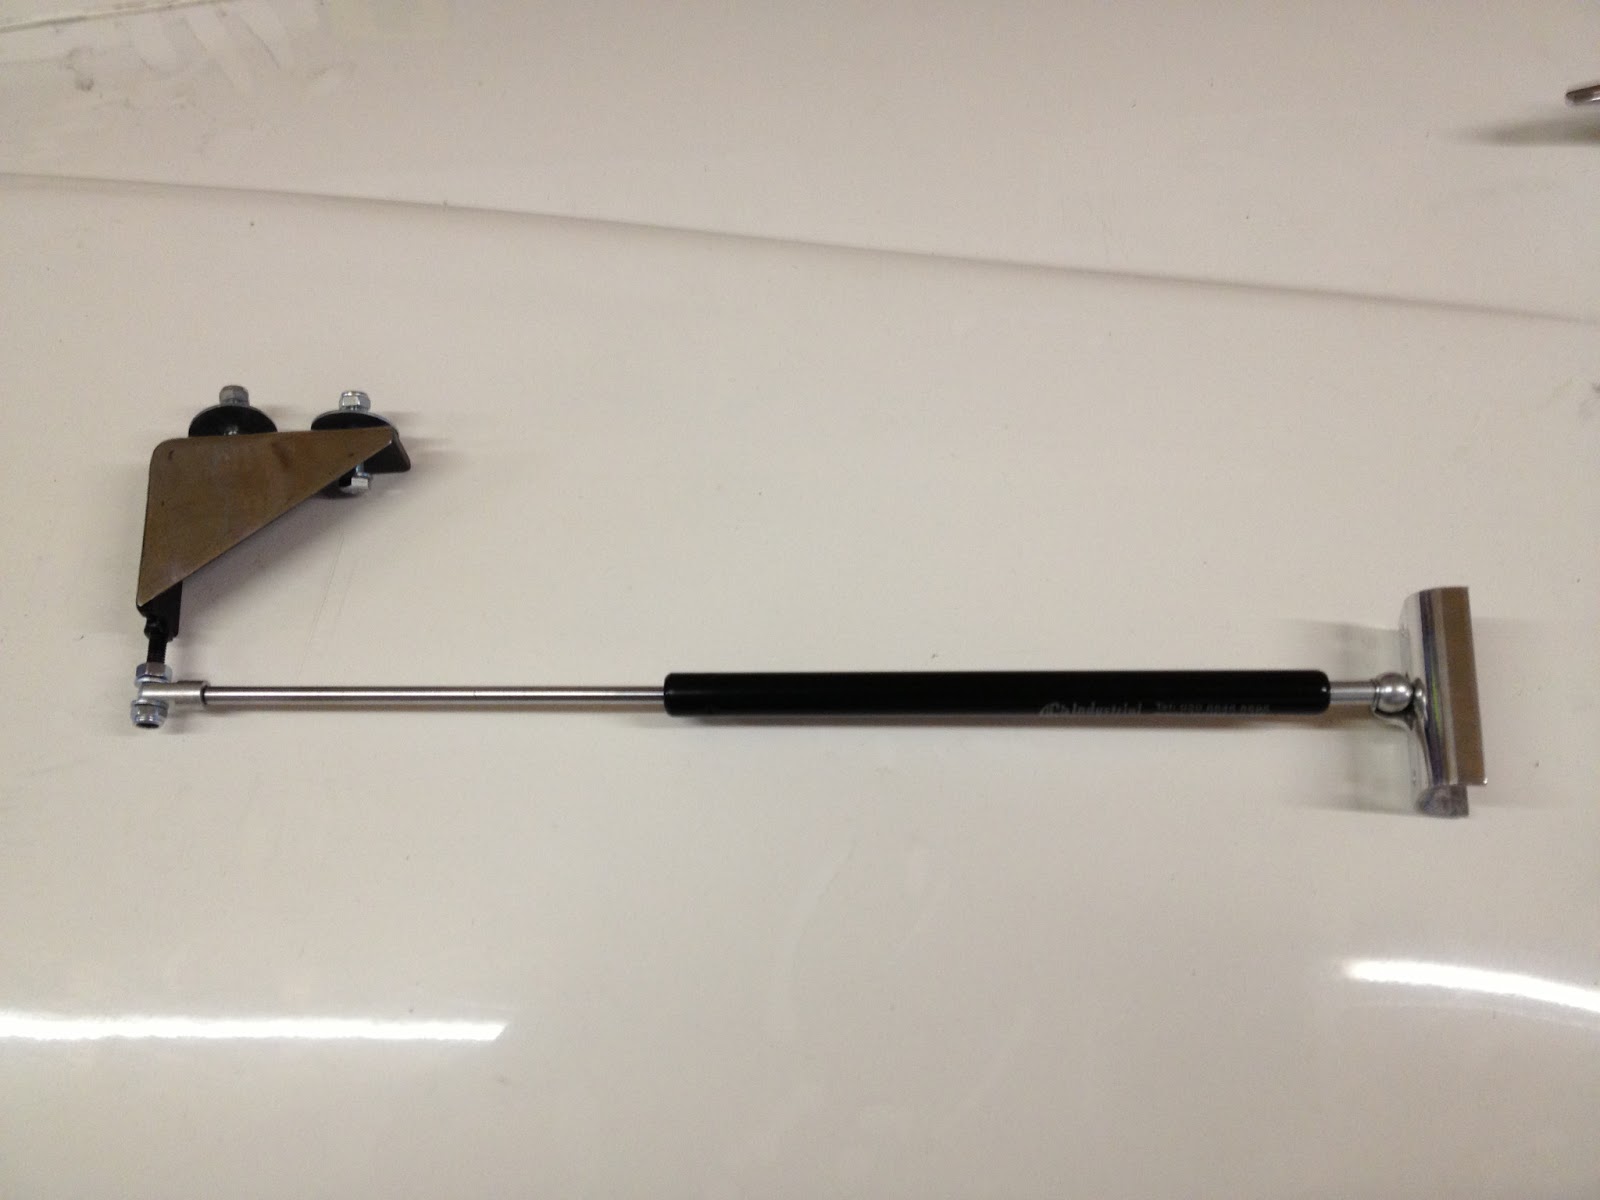
The bonnet setup is basically an right angle bracket (with a face of polished stainless steel, for strength and cosmetics) with the gas ram that then attaches to another U shaped bracket and then that to the rib's moulded into underside of the bonnet.

Its hard to show the bracket fitted on the inner wing, simply because its polished stainless steel and it just reflects the light, but this simply bolts through the inner wing with the mounting for the bottom of the gas ram protruding out under the rain channel. The bracket is fitted roughly 1" back of the chassis crossover. This is so that enough room is available for when the ram is in the closed position.

When the bracket is fitted its just a simple case of measuring back 11" along the water channel from the lower gas mount point and transfer that mark to the underside of the bonnet for the top mount plate.

These measurement's are important as they decide the amount of angle when the bonnet is open... in hindsight i would have adjusted slightly to give me a little more open angle, but its not going to worry me as its perfectly acceptable as it is now.


When fitting the top bracket AK say just to rivet in place. Now that's perfectly fine, but when it comes to getting it painted, i don't want to have to drill the heads off. And more importantly i don't want rivets loos in the bonnet rib, so that every time i lift the bonnet i can here them drop down the front. So i just simply marked the correct position and sunk in a couple of riv nuts, this then allows me to bolt the top bracket in place and undo when i want. No need to worry about masking off when the body goes to paint.... I'll just remove the gas rams totally.


Now once the top and bottom bracket are fitted the bonnet will hold itself up on its own!!! bye bye trusty piece of 2x2, i might have to frame that bit of timber its been so much use wheel chock, cut size for the windscreen rake, bonnet stay, boot stay and bits cut off to wedge the door latch plates.

Now it comes to bleeding the gas rams... slowly slowly catch the monkey. So simply remove both rams (they now just unscrew from the mount plates) and with the valve provided remove a little gas at a time. Jon advised that with one ram on the bonnet its should have just enough gas to let the bonnet fall, as so when they are both fitted they will hold the bonnet without any issues.


I will admit now that i did balls up on one, i was letting out the gas and as i unscrewed the valve it drained all / 90% of the gas from the ram, so this has been relocated to the boot as it has a lesser load to deal with.

And with most progress on this car its a classic case of "two steps forward, one step back"

the gas rams have pushed the bonnet back so mush (in the closed position) that my bonnet lock cams are catching again on the water channel. So some more adjustment there along with the bonnet shut gaps. All part of the fun i suppose.

Another concern i have is that when the bonnet is closed the rams are both directly above the manifolds so they will be exposed to a massive amount of heat. I have seen a couple of posts on the CobraClub forum regarding this and failed struts, but i will cross that bridge if and when i get to it.

Garage time wouldn't be the same anymore without a visit from my little mate to have a good look at whats going on. Hes still a little scared when the engine gets fired up, but I'm sure he will learn to love it...... his dad certainly did!!!

I also believe that he could be made into a bonnet mascot as he would meet the IVA test with the 3mm radius?? not to sure about the visibility. Cheers for the help little mate!!!


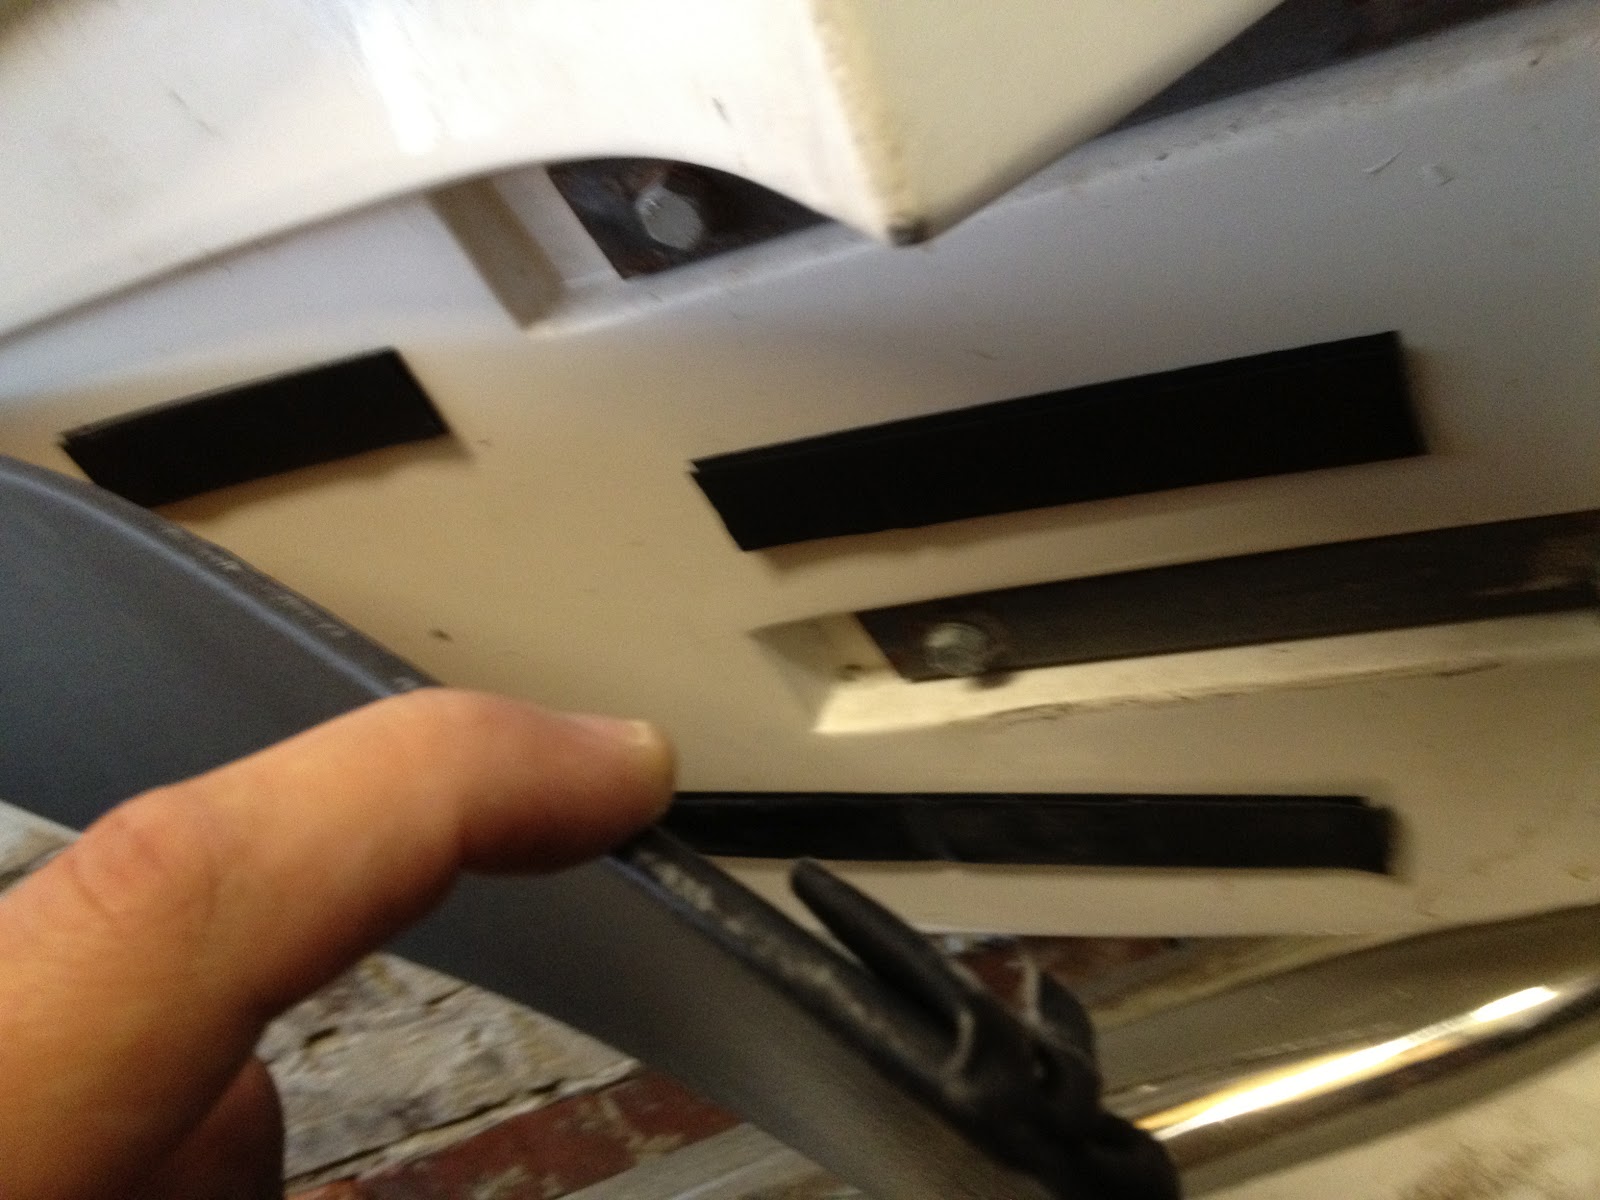
So moving onto the boot. a little more thought here than just simple drill and mount like the front. The gas lower brackets need to be bonded to the underside of the rear wing. AK advise to just bond in with filler, which I'm sure is OK, But a fair amount of force is being held on these brackets, and to add with the continual use of the boot i don't want brackets to come loose in the future. So i wanted to add the "belts and braces" technique. This is simply just drilling through the water drain channel and the bracket and holding in place with a rivet.


The rivet you can see here in the water channel, but it will be practically unnoticeable when its been painted and the rubber boot seal is back on. And it will add some much needed strength to the bracket and not allow any movement which may start to de-bond it from under the wing.


Now onto the top brackets for the rams. Exactly the same principle as the bonnet here, again I'm using riv nuts to allow removal of the brackets come paint time. You can see in the picture the initial holes i have filled when i was experimenting with my internal boot hinges. This i suppose was lucky it was a failure as the fixings would have clashed with the mounting plate. But I'm still a little disappointed i couldn't get them to work..... maby on the next one!!??


So that's the boot rams fitted, another job ticked off the list. Overall I'm very happy with the fitting of them all. As you can see in the picture with the boot open that it is drooping a little on the right. This is because its the ram which i let all the gas out of by mistake... error.

Its not that noticeable and i did make enquiry's with the manufacturers regarding re-gassing, They have a small cost of £5 to re-gas's...... and £16 courier as its compressed nitrogen. So that can be added to a snags list after completion of the car.

Friday, 4 January 2013

Im NOT Dead!!!!

Greetings and happy new year to all.

I apologise for such an epic amount of time since any update. I have received a few messages through the CobraClub forum from readers of this blog, hoping that i have the faith still to finish.
Times haven't been easy at "Camp Tommy" as the Christmas festive season has taken its annual drain on what little savings i had, and a special thanks to N-Power who gave me the best Christmas present on the Friday before Christmas..... a fecking huge gas bill!!!

As so not to depress you all with my tales of pity and misery, ill just keep you posted with updates that an order went to AK this week for bits and pieces so some further progress in the next few weeks...... keep the faith!!! I'm really going to push for a late 2013/spring 2014 completion on this now. The missus is wanting more kids??? fuck knows why? we have a 2 year old now who is bloody hard work. And with comments from friends and family that say "its easier with two" just get evil glares and abuse thrown at them. Car first... more kids later... end off!!! (don't hold me to this please, I'm only human)

So i wish you all a nappy new year, i hope the festive season was nice and relaxing now back to the daily grind. Further updates ASAP promise!!

Thursday, 13 September 2012

Door Latches

 Well i did promise an update ASAP regarding fitting the door latch. I had fitted one previously on the offside but i didn't get any pictures i was happy with. So here is a little write up of the nearside.

With the door card in position and held in place with the latch (very important as it spaces the latch off the door skin) i started by firstly checking that i could get a nice close on the striker. I did this by cutting some blocks of wood to hold the striker mounting plate up against the inner lip if the door slam. This can be a little tricky as you are trying to get a good close position so the door gap is even all the way round and the height of the door against the front and back scuttle. For me the nearside was simple but the offside will require a little more prep work before a paint finish.


Once i was happy with that the striker plate is bonded on using a good splodge of P38/P40 (P40 here) to bridge the gap and add some strength. The wooden wedges put back in to add the support, then close the door, adjust all the alignment and leave it to set. Do not be tempted to have a bash at opening/closing the door. You will just knock everything out of place.

Once cured off i then wanted to beef up fitting of it all. In my opinion the doors getting closed puts allot of stress into the striker and mounting plate, so if i did as the manual suggested and just used the P40 and wooden wedge then i just feel it wouldn't last long before working its way loose. Not forgetting it will have the road vibration as well as the door opening and closing so needs to be fairly solid.


So once the P40 had cured i could remove the wooden wedges and i simply drilled a hole through the door panel and the striker mounting plate (one below, two above) i countersunk the heads so they wont be visible once the door seal goes on, and also they will be painted when it goes into paint. I secured them with some nylock bolts and spreader washers so now with these tight even if the P40 does split, the striker wont move back or forth. Now to test the door latches nicely..... and it does!!! Happy Days!!


 Last little bit on this task is to secure the rest of the door card. Again because i don't want any fixings showing or ripples under the leather i just am holding it all in place with some self adhesive velcro. This is really sticky M3 bond, unlike some of the cheaper stuff from hobby shops, and it holds it all lovely.

So another task ticked off the list. one stage closer to completion.... but still a long road ahead of me!!!

I'm still saving for the money for the wipers, so that will hopefully be my next update!


Thursday, 6 September 2012

Door cards and latches.


Time to start fitting the door locks/latches. In order to do this i need to make and fit the door cards as they act as a spacer between the door skin and the latch (about 5mm)

I have decided to do my own interior trimming as its something i enjoy doing, and can have superb results if done correctly. I will probably still go with the seat shells from AK simply because i like the fitting of the headrest (now mandatory for IVA) and trim them myself in a gorgeous deep red leather. 

So i started off making a template in card of the door card. This is just smaller than the door skin, as so the rubber door seal will mate up against the door as opposed to the leather of the door card. I'm not a massive fan of pockets in the door cards, i just find them useless in a car with no roof and is just a place to keep clutter... so no pocket = no clutter. In theory! As you can see its a very simple shape to trim with the only cutout for the striker and latch securing holes, so its just a very simple and enjoyable task of covering the hardboard in some nice cloth.

 I have gone with a nice black leatherette/plether and will compliment the black carpets (when i get them) and the dark carbon fibre dash. All the hardboard and cloth set me back a grand total of £10, so this is a very cheap part of the build, and necessary in order to progress with fitting then door latch.

The cloth is bonded to the board using impact adhesive, which is mega stuff to work with it smells superb and if used correctly sticks like sh*t to a blanket.
 The door card when fitted is held in place via the latch as that bolts through the door card into the door, nice and secure. Towards the front of the card and bottom edge, I'm simply holding it to the door using Velcro. this means no fixings to drill or uneven surface under the cloth and easily removed without damage.

I have decided against padding the cards with foam as i want a nice flat smooth surface, as the dash is also non padded so i want to keep the same style/theme throughout the interior.


So the door card finished in just a few hours work.
It looks very good and I'm very happy with the end result, very cheap to do also!

I have put a video below to show the door lock in action with the card fitted. I will do a separate post on how i have fitted the latch and how it works, but i simply wanted to fit one first (and be happy with it) before i start the other side with a photo write up. As you can see in the video i have not got the rubber door seal fitted and obviously no carpets, which will hide all the bits and pieces and the striker fixings.

Overall happy with the one side so far, a good solid clunk (sounds much better than a Golf) and the echo will go once the carpets are fitted.


Sunday, 2 September 2012

A Visit from Mr Cockup!!!!

 Well before i introduce you to Mr Cockup, I'll quickly show you the addition fuse box. AK make no provisions in the loom for additional circuits, such as radio, alarm, power take off (Cig lighter socket) etc.. So pictured right is the secondary fuse box iv fitted myself. This is basically running form the battery feed on the starter motor. This gives me a number of feeds available to fit whatever accessory i feel i want. Although im not intending to fit a stereo at a later date i might just run a small amplifier with a concealed iPod connector so i can have some tunes when i park up... after all a stereo is pretty redundant with no roof and side pipes i would have thought??

 So my visit from Mr Cockup starts when i was pressuring up my brakes again. I jacked the car up and as it raised the back end i saw the rear wheel drop and have a huge amount of play in the hub.... ??? not good. So after a quick strip down of the rear hub (2-3 minute job now) i was confronted with the picture on the left. As the splined drive shaft enters the hub i have not had a flat surface for the oil seal to mate against. The shaft itself has a radius edge that has been chewing the oil seal to bits as I've been rolling the car in and out of the garage, and the first drive (about 10 meters in total) 

So as you see here (excuses the dust) the yoke of the drive shaft is threaded one end for the castle hub nut, and the other end has that radius edge which needs a contoured spacer shim on that then gives a flat surface for the hub bearing and oil seal to mate to as its torqued up.... with me not having this previously will explain the ridiculous amount of shims i had to put in between the drive shaft and the brake disk to give an acceptable camber. 
 I stripped the rear hubs of the car and gave them a good inspection because of me being a dickhead and not paying 100% attention during the strip down of the donor parts. But after some new oil seals and getting hold of a couple of the spacers... i was ready to start again with setting up the back end.... Pictured below you can see how, when fitted this gives a flat surface to the drive shaft against the hub/oil seal. If you compare the picture below with the picture above i must have been fricken stupid to have fucked this up!! I was always concerned with the excessive amount of shims between the diff and shaft and also why i couldn't get the diff output studs to penetrate the nut more than 3-4 rotations before getting tight. Now this is all sorted and i now only have 2 shims on the one side (as opposed to 8-9) and 1 on the other.


 Below on the left shows the new oil seal ready to be fitted against the damaged seal that was removed.... you can see how the seal has had a groove cut out where it has been rubbing against the edge of the drive shaft.

Below right shows how iv had to clean all the crud out of the hub, before it penetrated the bearing, this would have reduced the life of the bearing and could have potentially been a disaster waiting to happen!!!


So with the camber adjusted again, all was looking good. This picture shows the face of the hub measuring 89.8 (about 1/4 degree negative camber) which is what is required as stated in the AK build manual. This measurement is mirrored when the build wheel is on and a reading taken from each edge of the rim.

I will be checking this again when i get my wheels and tyres, just to be 100% sure its set correctly..... but im 100 times happier with this now, compared to how it was previously.

So job done..... next is onto door cards and door locks, along with dash recover to hide the nibs in the carbon fiber.