
I placed an order with AK for the gas rams for the boot and bonnet, along with the windscreen wiper package (see next update)
Upon arrival i started with a quick dry run off all the parts that had arrived. After checking a couple of things with AK Jon advised me to do the bonnet first and boot second. This is because the gas rams that are sent are rock solid with gas and you have to bleed the gas out using a valve provided to give the correct resistance for the item being held. With the bonnet being heavier than the boot it makes sense to to this first in case too much gas is let out by mistake, it can then be used for the boot.
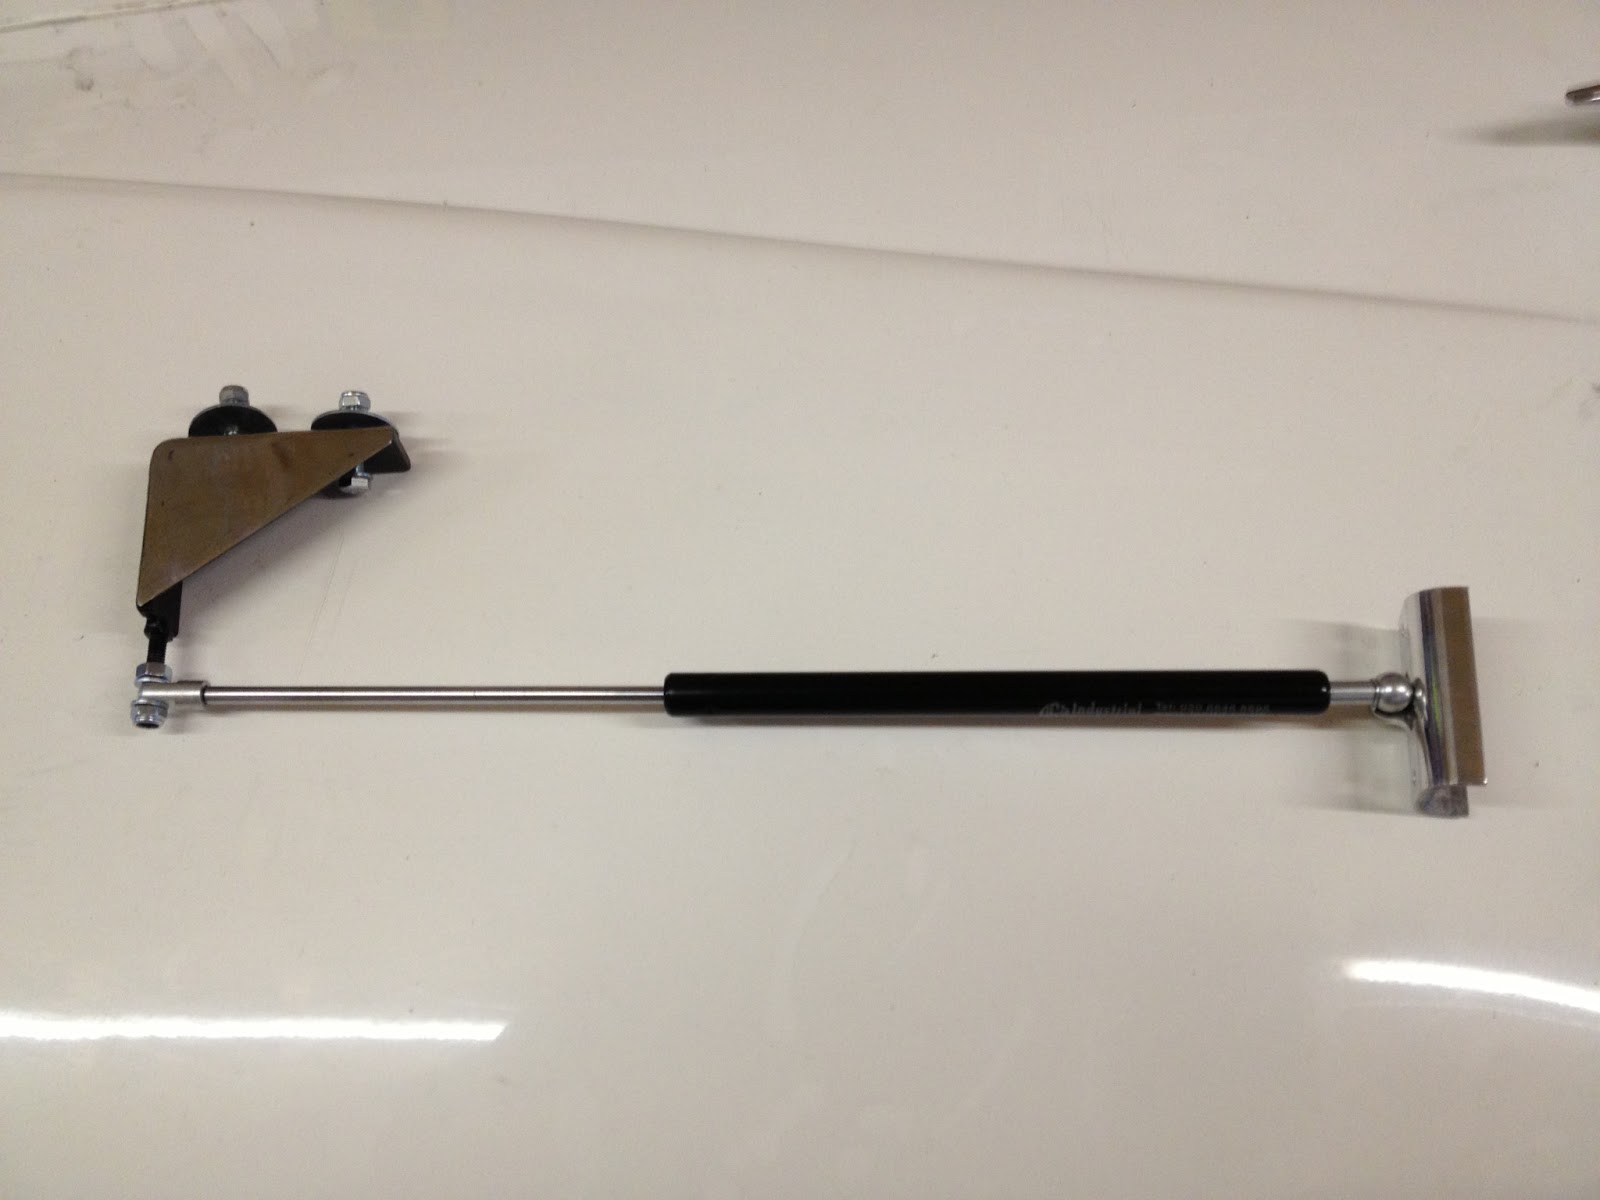
 The bonnet setup is basically an right angle bracket (with a face of polished stainless steel, for strength and cosmetics) with the gas ram that then attaches to another U shaped bracket and then that to the rib's moulded into underside of the bonnet.
  Its hard to show the bracket fitted on the inner wing, simply because its polished stainless steel and it just reflects the light, but this simply bolts through the inner wing with the mounting for the bottom of the gas ram protruding out under the rain channel. The bracket is fitted roughly 1" back of the chassis crossover. This is so that enough room is available for when the ram is in the closed position.
 When the bracket is fitted its just a simple case of measuring back 11" along the water channel from the lower gas mount point and transfer that mark to the underside of the bonnet for the top mount plate.
These measurement's are important as they decide the amount of angle when the bonnet is open... in hindsight i would have adjusted slightly to give me a little more open angle, but its not going to worry me as its perfectly acceptable as it is now.


When fitting the top bracket AK say just to rivet in place. Now that's perfectly fine, but when it comes to getting it painted, i don't want to have to drill the heads off. And more importantly i don't want rivets loos in the bonnet rib, so that every time i lift the bonnet i can here them drop down the front. So i just simply marked the correct position and sunk in a couple of riv nuts, this then allows me to bolt the top bracket in place and undo when i want. No need to worry about masking off when the body goes to paint.... I'll just remove the gas rams totally.

Now once the top and bottom bracket are fitted the bonnet will hold itself up on its own!!! bye bye trusty piece of 2x2, i might have to frame that bit of timber its been so much use wheel chock, cut size for the windscreen rake, bonnet stay, boot stay and bits cut off to wedge the door latch plates.
Now it comes to bleeding the gas rams... slowly slowly catch the monkey. So simply remove both rams (they now just unscrew from the mount plates) and with the valve provided remove a little gas at a time. Jon advised that with one ram on the bonnet its should have just enough gas to let the bonnet fall, as so when they are both fitted they will hold the bonnet without any issues.
And with most progress on this car its a classic case of "two steps forward, one step back"
the gas rams have pushed the bonnet back so mush (in the closed position) that my bonnet lock cams are catching again on the water channel. So some more adjustment there along with the bonnet shut gaps. All part of the fun i suppose.

Garage time wouldn't be the same anymore without a visit from my little mate to have a good look at whats going on. Hes still a little scared when the engine gets fired up, but I'm sure he will learn to love it...... his dad certainly did!!!
I also believe that he could be made into a bonnet mascot as he would meet the IVA test with the 3mm radius?? not to sure about the visibility. Cheers for the help little mate!!!

So moving onto the boot. a little more thought here than just simple drill and mount like the front. The gas lower brackets need to be bonded to the underside of the rear wing. AK advise to just bond in with filler, which I'm sure is OK, But a fair amount of force is being held on these brackets, and to add with the continual use of the boot i don't want brackets to come loose in the future. So i wanted to add the "belts and braces" technique. This is simply just drilling through the water drain channel and the bracket and holding in place with a rivet.

The rivet you can see here in the water channel, but it will be practically unnoticeable when its been painted and the rubber boot seal is back on. And it will add some much needed strength to the bracket and not allow any movement which may start to de-bond it from under the wing.

Now onto the top brackets for the rams. Exactly the same principle as the bonnet here, again I'm using riv nuts to allow removal of the brackets come paint time. You can see in the picture the initial holes i have filled when i was experimenting with my internal boot hinges. This i suppose was lucky it was a failure as the fixings would have clashed with the mounting plate. But I'm still a little disappointed i couldn't get them to work..... maby on the next one!!??

So that's the boot rams fitted, another job ticked off the list. Overall I'm very happy with the fitting of them all. As you can see in the picture with the boot open that it is drooping a little on the right. This is because its the ram which i let all the gas out of by mistake... error.
Its not that noticeable and i did make enquiry's with the manufacturers regarding re-gassing, They have a small cost of £5 to re-gas's...... and £16 courier as its compressed nitrogen. So that can be added to a snags list after completion of the car.
